Unlock Palworld dedicated server power for multiplayer fun and seamless management—expand your community with stability and control.
So, you've been exploring the vibrant world of Palworld solo for a while, and the thought hits you—wouldn't this be way more fun with friends? You're absolutely right. But when your crew grows beyond the cozy four-player limit of a private session, things get a bit tricky. Maybe you've tried the official servers, but let's be real, dealing with potential cheaters or unexpected save wipes can really put a damper on the adventure. That's where the magic of a dedicated server comes in. Think of it as your group's own private island in the Palworld universe, a persistent world that doesn't rely on one person's game client to stay online. It's a game-changer for larger communities, offering a stable, flexible, and entirely yours playground. Setting one up might sound daunting, but trust us, it's more straightforward than taming your first Pal. And if you ever need to move that server to a new machine? No sweat, your hard-earned progress can come right along with it. Let's dive into how to create and manage your very own Palworld sanctuary.
What Exactly is a Palworld Dedicated Server?
Alright, first things first—what are we even talking about here? In Palworld, you have a few ways to play with others:
-
Private Multiplayer: Perfect for a small squad of up to four. One player hosts the game directly from their own session. Simple, but limited.
-
Official Servers: Run by the developers, Pocketpair. They can handle up to 32 players, but you're sharing the space with strangers, which can be a mixed bag.
-
Community Servers: These are essentially dedicated servers that have registered to appear on the game's public server list for anyone to find.
-
Dedicated Servers: This is the star of our show. A dedicated server is a separate, always-online process. The host doesn't need to be in-game for others to play. It's like having a 24/7 clubhouse for you and your friends (or a whole community!).
The biggest perks? Player capacity—you can host many more pals than just four. And flexibility—you have more control over the environment. You can host it on your own hardware or rent one from a hosting service. Pretty neat, huh?
Gearing Up: System Requirements
Before you start, let's make sure your machine is up to the task. Here's what Pocketpair recommends for running a smooth server:
| Parameter | Requirement |
|---|---|
| CPU | 4 Cores (Recommended) |
| Memory | 16GB (32GB+ recommended for larger servers) |
| Network | UDP Port 8211 open (Default, can be changed). Router must support port forwarding. |
| Storage | A fast SSD is recommended. Slower storage might risk corrupting your world save! |
| OS | Windows 64-bit or Linux 64-bit |
If your computer checks these boxes, you're good to go. If not, well, it might be time to consider a hosting provider or that secondary machine we'll talk about later.
Your Step-by-Step Setup Guide (Windows/Steam)
Ready to build your server? Follow these steps. Don't worry if you're not a tech wizard—it's mostly just following instructions.
-
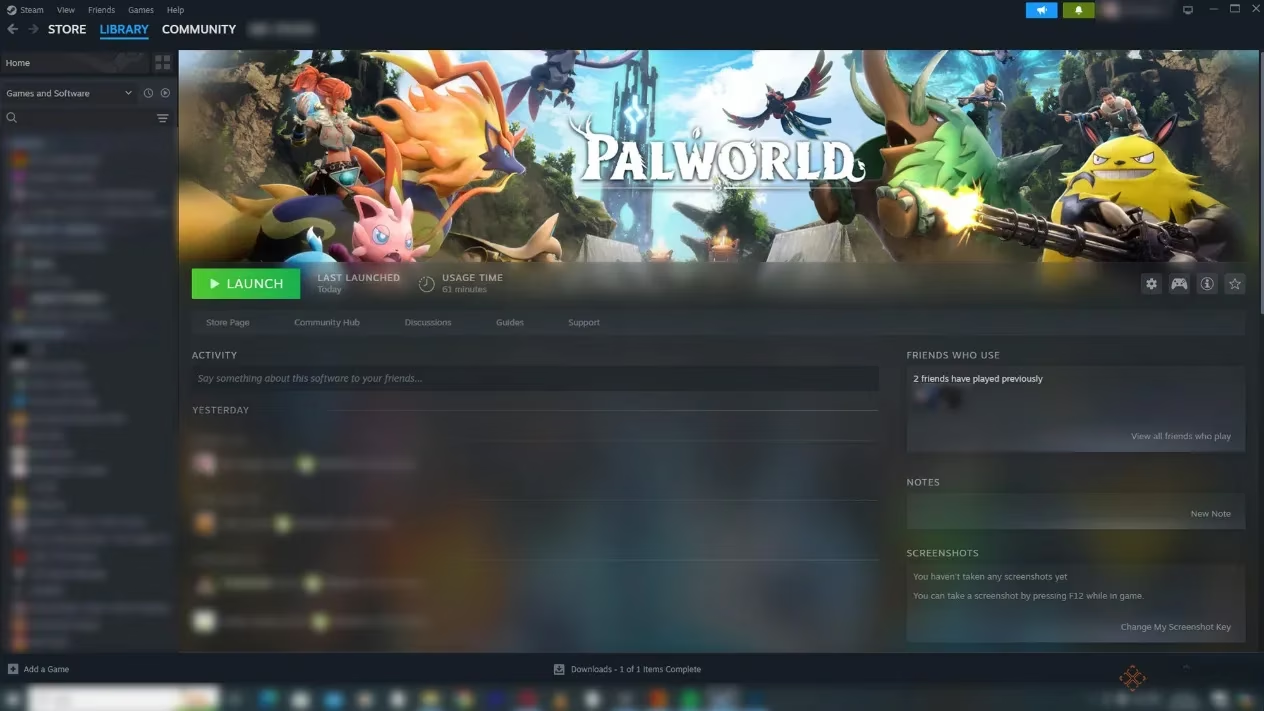
Download the Server Tool: Fire up Steam. Go to your Library. Now, here's a common hiccup—you need to look in the right place. Click the dropdown menu under the 'Home' button in your Library and select 'Tools'. Now, search for 'Palworld Dedicated Server' and install it.
-
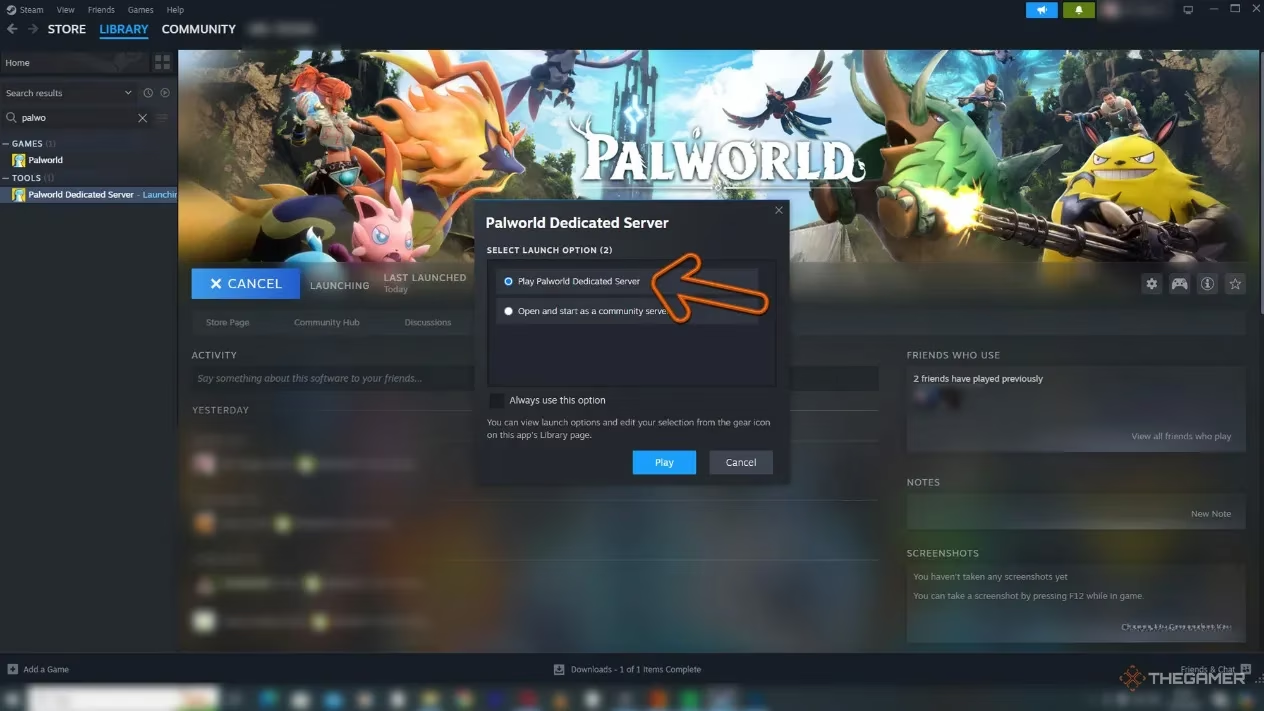
First Launch: Find the 'Palworld Dedicated Server' in your Steam Library (still under Tools!) and hit 'Launch' or 'Play'. A little Steam window will pop up; select 'Play Palworld Dedicated Server'.
-
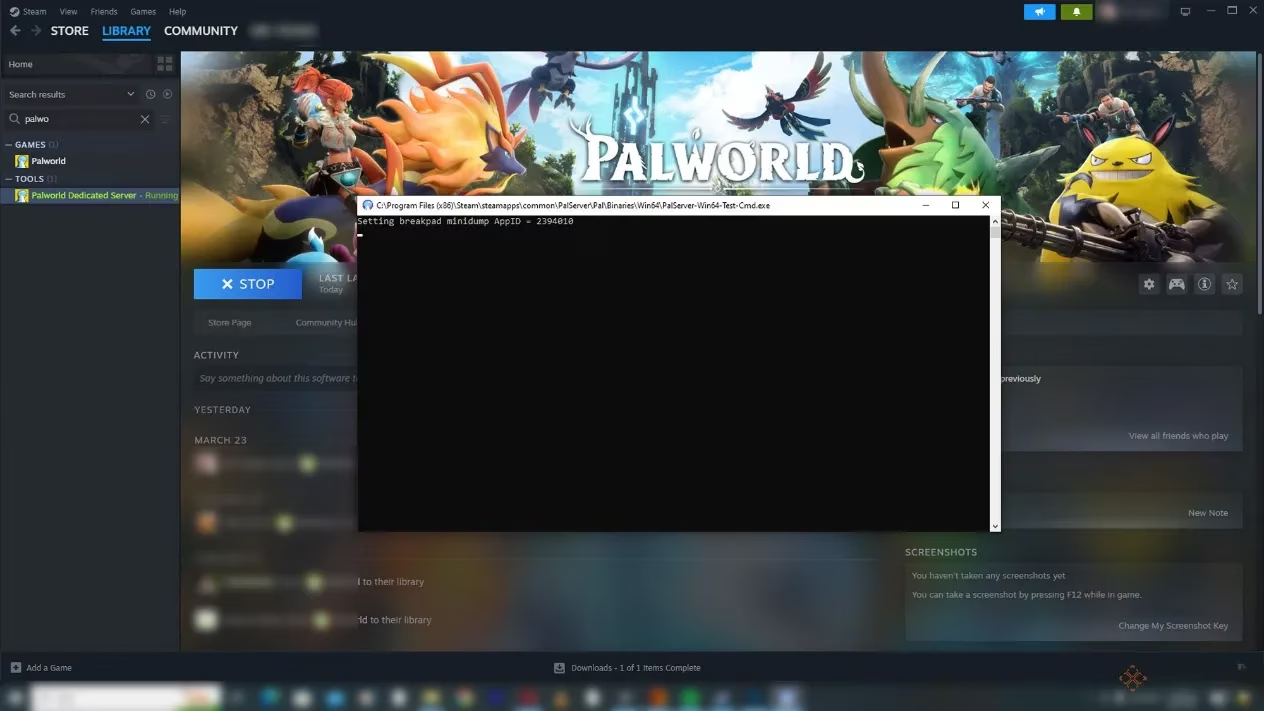
The Magic Window: A black Command Prompt (CMD) window will flash open. You'll see a line of text ending with a unique number. Seeing this? Congratulations, your server is now running in the background! You can close this CMD window and the Steam tool window. The server is still active.
-
The Crucial Step: Port Forwarding: This is the part that lets your friends from the outside world find your server. You need to tell your router to send traffic for Palworld to your computer. Log into your router's admin page (this is different for every brand—check your router's manual). Look for Port Forwarding or Virtual Servers settings. Create a new rule:
-
Protocol: UDP
-
Port: 8211 (This is the default)
-
Internal IP Address: Enter the local IP address of the computer running the server.
-
-
Share the Address: Your server is live! To invite friends, they need your Public IP Address and the port. Find your public IP by searching "what is my IP" on Google. Give your friends this address in the format:
XXX.XXX.XXX.XXX:8211. -
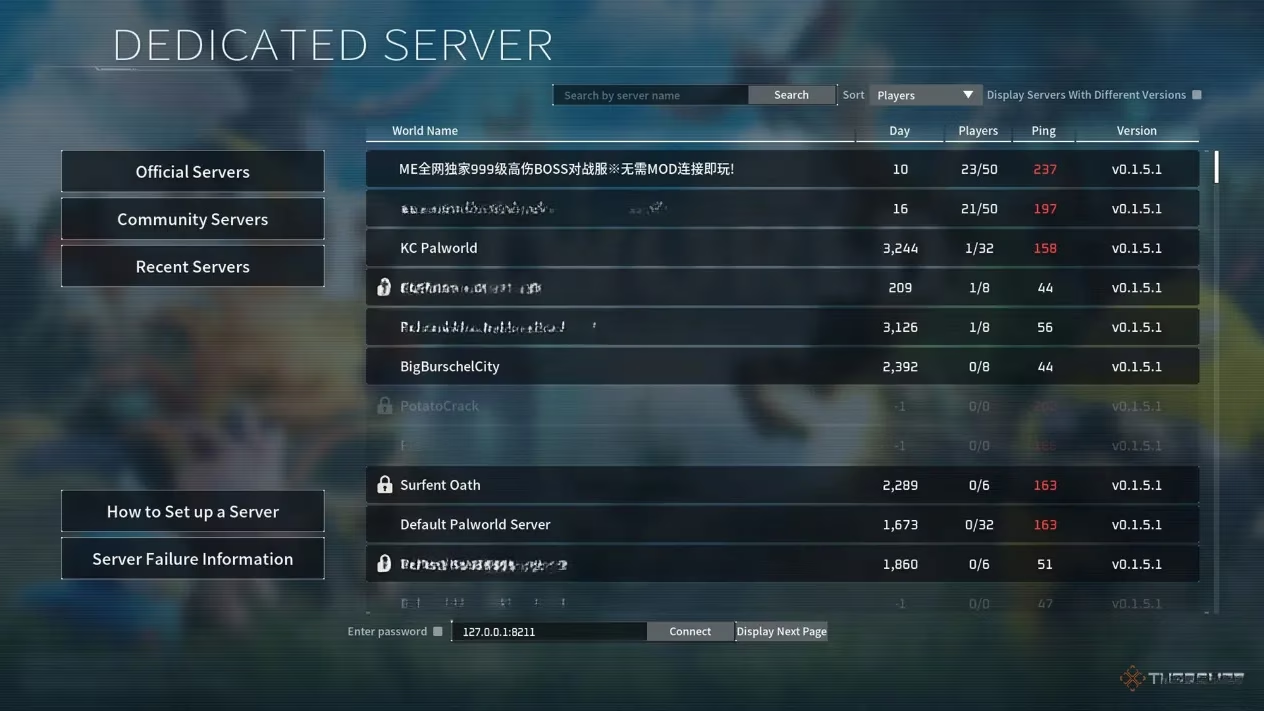
Joining the Party: Your friends (and you!) open Palworld. Select 'Join Multiplayer Game' from the main menu. At the bottom of the screen, there's a box to enter an address. They should paste the
IP:Portcombo you gave them. You, as the host on the same network, should use your computer's local IP address (like 192.168.1.XXX:8211) to connect.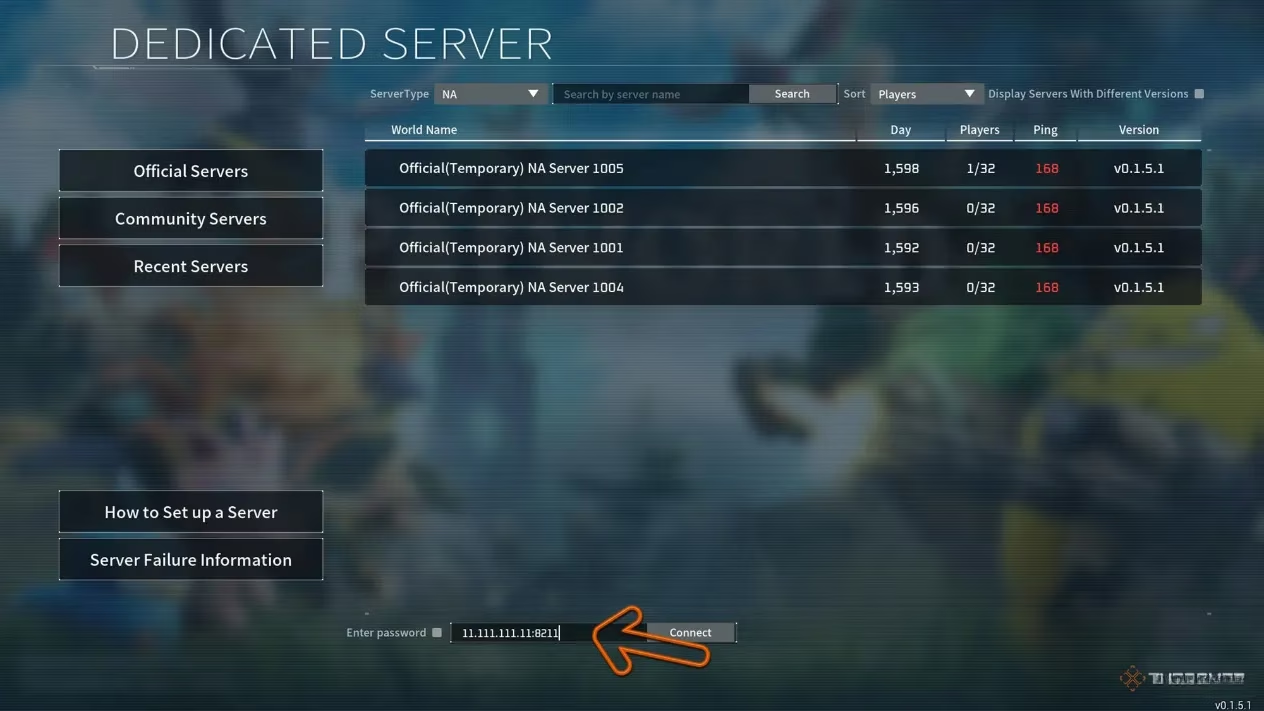
And voilà! You're now the proud owner of a bustling Palworld server. But what if you need to move it?
Moving Your Server: No Progress Left Behind
Life happens. Maybe your main PC needs a break, or you scored a better machine. The good news is you can move your entire server—world, buildings, Pals, and all—without starting over. It's like packing up your base and teleporting it.
Here’s the safe migration process:
-
Prep the New Machine: On the computer that will become the new server, install the 'Palworld Dedicated Server' tool from Steam (just like in Step 1 above). Launch it once so it creates all the necessary folders, then close it.
-
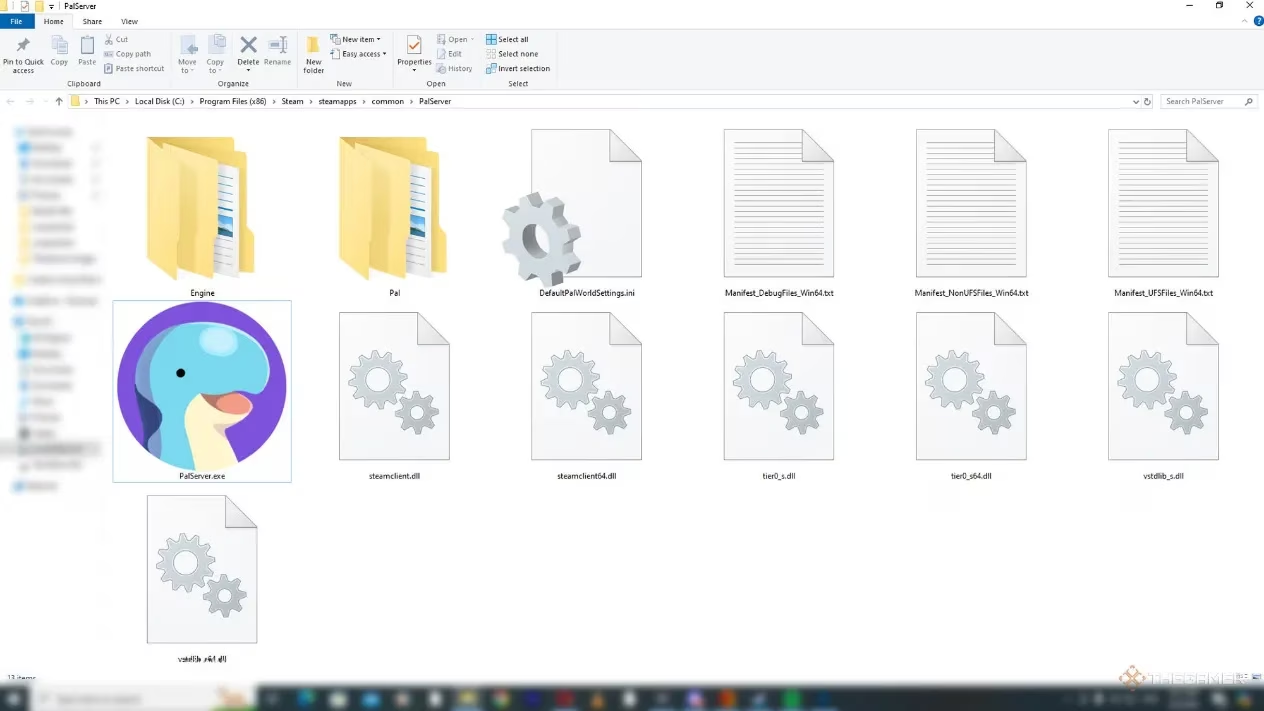
Locate and Copy the Save Data: On your old server computer, go to Steam, right-click on 'Palworld Dedicated Server', select Manage > Browse Local Files. This opens the installation folder. Inside, you'll find a folder called
Palserver. This folder contains your world! Copy the entirePalserverfolder.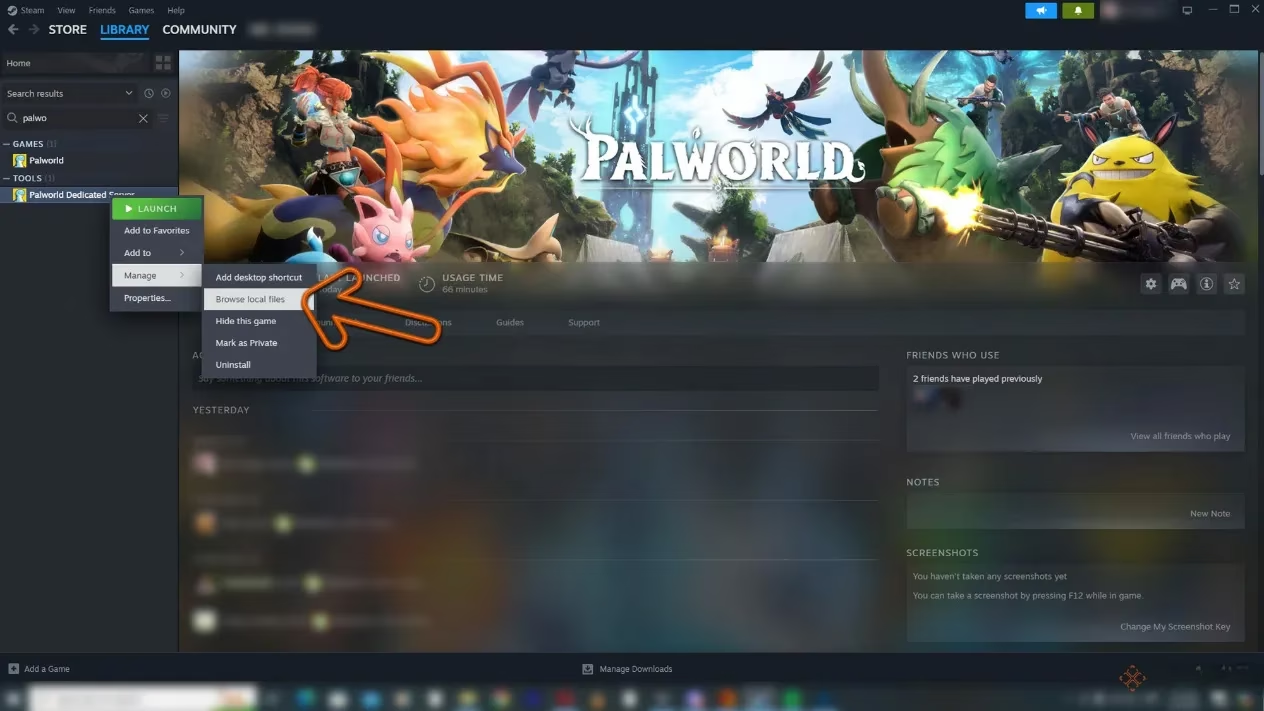
-
Paste and Replace: On the new server computer, navigate to the same folder location (right-click on the tool in Steam > Browse Local Files). You'll see an empty
Palserverfolder there. Paste the contents from your old computer here, allowing it to overwrite any existing files. This transfers your world. -
Reconfigure the Network: On the new computer, you must repeat the Port Forwarding step on its router. Set up a rule for UDP port 8211 to point to the new computer's local IP address. Important: You should remove or disable the old port forwarding rule on your original router to avoid conflicts.
-
Fire It Up: Run the Palworld Dedicated Server tool on the new computer. See the CMD window pop up? Perfect. You can close it once the text appears. Your world is now running from its new home.
-
Update Your Friends: If the new computer is on the same home network, the connection address might not change. But if it's on a completely different internet connection (like a friend's house or a rented server), you'll need to give everyone the new public IP address and port.
And that's the whole shebang! Whether you're setting up from scratch or moving your digital frontier to greener pastures, the process is designed to be as painless as possible. So gather your friends, build your perfect Palworld, and remember—the only limit is your imagination (and maybe your server's RAM). Happy hosting!